Yard Machine Edger 3.5 HP Manual: A Comprehensive Guide
This manual provides detailed instructions for safe assembly, operation, and maintenance of your Yard Machine 3.5 HP edger, covering essential safety tips and troubleshooting guidance.
Published on April 27, 2017, this resource ensures optimal performance and longevity, referencing the official PDF document available online for comprehensive support.
The Yard Machine 3.5 HP edger is a powerful tool designed for creating clean, professional-looking edges along lawns, sidewalks, and driveways. This guide serves as a comprehensive resource for owners, detailing everything from initial setup to ongoing maintenance. Understanding your edger’s capabilities and limitations is crucial for safe and effective operation.
This manual, dated April 27, 2017, and accessible as a PDF online, covers essential aspects like safety precautions, assembly procedures, and troubleshooting tips. It’s designed for both novice and experienced users, ensuring you can maximize the performance and lifespan of your edging tool. Proper use will result in beautifully defined landscapes, enhancing your property’s curb appeal.
Always refer to this manual before operating or servicing your Yard Machine edger.
Understanding the Edger’s Key Features
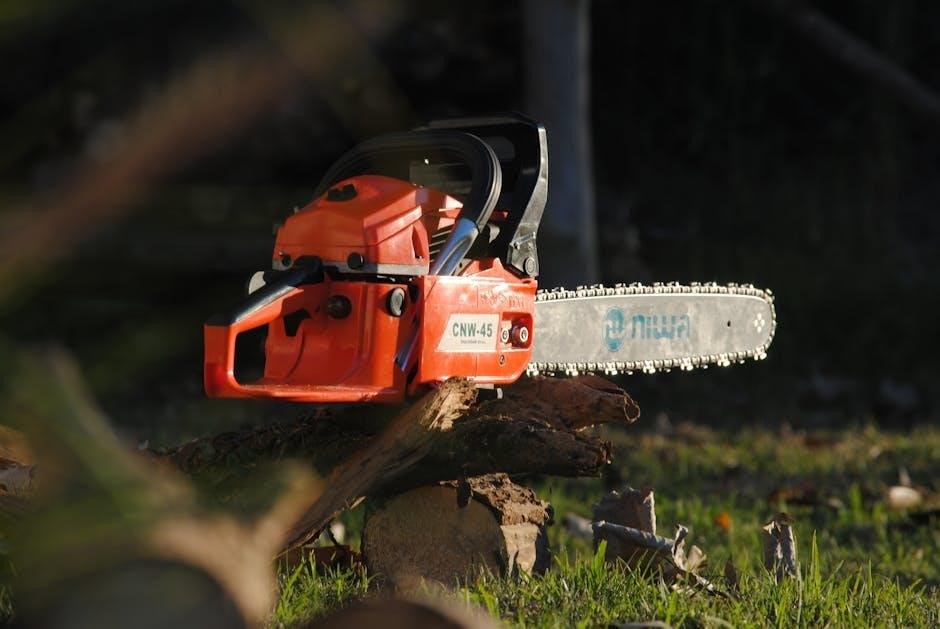
The Yard Machine 3.5 HP edger boasts a robust 3.5 horsepower engine, providing ample power for tackling various edging tasks. Its key features include a durable steel blade designed for clean and precise cuts, and an adjustable depth control allowing customization for different edging needs.
The edger’s design prioritizes user comfort and control, featuring an ergonomic handle and lightweight construction for maneuverability. The blade guard enhances safety by shielding against debris. As detailed in the April 27, 2017 manual, understanding these features is vital for optimal performance.
Proper utilization of these components, as outlined in the online PDF, ensures efficient edging and a professionally maintained landscape.
Safety First: Operating the Edger Responsibly
Prioritize safety by carefully reviewing the manual’s precautions before each use, ensuring responsible operation and preventing potential hazards while edging your lawn.
Essential Safety Precautions
Always disconnect the spark plug wire before performing any maintenance or adjustments to prevent accidental starting, a crucial step for your safety.
Never operate the edger without the guard in place; it shields against flying debris and potential injuries, ensuring a safer working environment.
Be mindful of bystanders, keeping them at a safe distance during operation to avoid accidental contact with the blade or ejected materials.
Inspect the work area for stones, toys, or other objects that could become projectiles, potentially causing damage or injury.
Avoid operating the edger in wet or slippery conditions, as this increases the risk of losing control and experiencing an accident.
Never alter the safety features of the edger; they are designed to protect you and maintain the integrity of the machine.
Read and understand the entire operator’s manual before using the edger, familiarizing yourself with all safety guidelines and operating procedures.
Personal Protective Equipment (PPE)
Always wear safety glasses or a face shield to protect your eyes from flying debris generated during edging operations, preventing potential eye injuries.
Wear sturdy, closed-toe shoes to safeguard your feet from accidental contact with the blade or ejected objects, ensuring foot protection;
Consider wearing hearing protection, such as earplugs or earmuffs, to minimize exposure to the edger’s engine noise, preserving your hearing health.
Wear long pants and sleeves to provide a barrier against potential cuts, scrapes, or abrasions from flying debris or vegetation.
Gloves are recommended to improve grip and protect your hands from vibrations and potential blisters during extended use.
Avoid loose clothing or jewelry that could become entangled in the moving parts of the edger, posing a safety hazard.
Ensure all PPE is in good condition and fits properly for maximum effectiveness and comfort during operation.
Avoiding Hazards During Operation
Always inspect the work area for rocks, wires, toys, or other hidden objects before starting the edger, preventing potential projectile hazards.
Be mindful of bystanders, keeping them at a safe distance from the operating edger to avoid accidental injury from flying debris.
Never operate the edger in wet or slippery conditions, as this increases the risk of losing control and experiencing an accident.
Avoid edging near electrical wires or underground utilities, potentially causing severe electrical shock or damage.
Do not attempt to edge on steep slopes, as this can lead to loss of control and a dangerous situation.
Maintain a firm grip on the edger at all times during operation, ensuring stable control and preventing accidental slippage.
Never leave the edger running unattended, preventing unauthorized use or accidental activation.
Assembly and Preparation
Carefully unpack all components and verify their presence, referencing the parts list in the manual before beginning assembly for a smooth setup process.
Unboxing and Component Identification
Upon receiving your Yard Machine 3.5 HP edger, carefully inspect the shipping carton for any signs of damage incurred during transit. Once confirmed, open the box and systematically remove all included components. It’s crucial to cross-reference the physical parts with the detailed parts list provided within the official manual (8eeda72c-e862-46fc-9616-cc0619ea1918.pdf).
Typically, you should find the edger housing, the engine assembly, the blade, a blade guard, an operator handle, and various hardware like bolts, nuts, and washers. Pay close attention to smaller parts, often packaged separately. Familiarize yourself with each component’s name and function before proceeding. Retain the packaging materials and the manual for future reference, especially regarding warranty claims or replacement parts. Proper identification now prevents confusion during the assembly stage.
Attaching the Blade and Guard
Securely attaching the blade and guard is paramount for safe and effective edging. Refer to the Yard Machine manual (8eeda72c-e862-46fc-9616-cc0619ea1918.pdf) for precise diagrams and torque specifications. Begin by aligning the blade with the mounting hub, ensuring the cutting edge faces the correct direction – typically outward.
Fasten the blade using the provided bolt and washer, tightening it to the manufacturer’s recommended torque. Next, position the blade guard over the blade, aligning the mounting holes. Attach the guard using the appropriate bolts, ensuring it’s firmly secured. A loose guard poses a significant safety hazard. Double-check all fasteners for tightness before operation. Improper installation can lead to blade detachment or injury.
Fueling the Edger – Recommended Fuel Mix
Proper fuel mixture is crucial for the 3.5 HP Yard Machine edger’s engine performance and longevity. The manual (8eeda72c-e862-46fc-9616-cc0619ea1918.pdf) specifies a 50:1 ratio of gasoline to 2-cycle engine oil. This means 50 parts gasoline to 1 part high-quality 2-cycle oil.
Always use fresh gasoline and a reputable brand of 2-cycle oil. Pre-mixed fuel is also acceptable, but ensure it’s specifically formulated for 2-cycle engines. Before fueling, ensure the edger is on a level surface and the engine is cool. Carefully pour the fuel mixture into the fuel tank, avoiding spillage. Never use straight gasoline, as it will damage the engine. Refer to the manual for fuel capacity details.

Operating Instructions
Follow the manual’s (8eeda72c-e862-46fc-9616-cc0619ea1918.pdf) detailed start-up and edging procedures for optimal performance and safe, effective landscape trimming.
Starting the Engine – Cold Start Procedure
Before initiating a cold start, ensure the fuel tank is adequately filled with the recommended fuel mixture, as detailed in the Yard Machine edger manual (8eeda72c-e862-46fc-9616-cc0619ea1918.pdf).
Engage the choke lever to its full position; this enriches the fuel mixture for easier ignition in cold conditions. Prime the engine by pressing the primer bulb several times until fuel is visible within it.
Grasp the starter grip firmly and pull the cord slowly until resistance is felt, then pull briskly to initiate the engine. Repeat this process if the engine doesn’t start on the first attempt.
Once the engine starts, gradually disengage the choke, allowing the engine to warm up before applying a full load. Refer to the manual for specific choke adjustment guidance.
Starting the Engine – Warm Start Procedure
When starting a warm engine, the procedure differs slightly from a cold start, as outlined in the Yard Machine edger manual (document ID: 8eeda72c-e862-46fc-9616-cc0619ea1918.pdf). Typically, the choke lever should not be engaged for a warm start.
Instead, ensure the throttle is set to the starting position, and gently pull the starter cord. The engine should ignite with minimal effort due to residual heat and fuel.
If the engine fails to start on the first pull, try priming the engine once or twice by pressing the primer bulb. Avoid excessive priming, as this can flood the engine.
Continue pulling the starter cord until the engine starts, then gradually adjust the throttle for optimal operation. Consult the manual for detailed warm-start troubleshooting.
Edging Techniques for Clean Cuts
Achieving professional-looking edges requires proper technique, as detailed in the Yard Machine 3.5 HP edger manual (8eeda72c-e862-46fc-9616-cc0619ea1918.pdf). Walk at a steady pace, guiding the edger along the desired line.
Overlap each pass slightly to prevent scalping and ensure a consistent depth. Maintain a slight angle with the edger wheel against the pavement or driveway for a clean, defined edge.
Avoid forcing the edger; let the blade do the work. For tougher areas, make multiple shallow passes rather than one deep cut. Regularly clear away debris to maintain optimal performance.
Practice on a less visible area to get a feel for the edger’s power and control. Refer to the manual’s tips section for advanced edging strategies.

Maintenance and Troubleshooting
Regular upkeep, as outlined in the manual (8eeda72c-e862-46fc-9616-cc0619ea1918.pdf), ensures peak performance and addresses common issues quickly and efficiently.
Blade Sharpening and Replacement
Maintaining a sharp blade is crucial for clean edging and efficient operation. The manual details procedures for safely removing the blade, referencing document 8eeda72c-e862-46fc-9616-cc0619ea1918.pdf for visual guidance.

Sharpening can be done with a file or grinding wheel, ensuring balance is maintained. A dull blade causes tearing and increases engine strain. If the blade is damaged beyond repair, replacement is necessary.
Always disconnect the spark plug wire before working on the blade. Use the correct replacement blade specified in the manual to avoid damage or injury. Proper torque is essential when reattaching, as outlined in the April 27, 2017 document, ensuring secure operation and preventing accidents.
Air Filter Cleaning and Replacement
A clean air filter ensures optimal engine performance and prevents damage. The Yard Machine 3.5 HP edger manual (document 8eeda72c-e862-46fc-9616-cc0619ea1918.pdf) details the filter’s location and removal process.
Regularly check the filter for dirt and debris. Foam filters can be washed with soap and water, then oiled lightly before reinstallation. Paper filters should be tapped gently to remove loose particles.
Replace the air filter when it becomes excessively dirty or damaged, as outlined in the April 27, 2017 publication. A clogged filter restricts airflow, leading to reduced power and potential engine overheating. Always ensure the filter is securely seated before restarting the edger, maintaining efficient operation.
Spark Plug Inspection and Replacement
Regular spark plug inspection is crucial for maintaining optimal engine ignition. Refer to the Yard Machine 3.5 HP edger manual (8eeda72c-e862-46fc-9616-cc0619ea1918.pdf) for specific instructions and the correct spark plug type.
Inspect the plug for fouling, wear, or damage. A properly functioning spark plug exhibits a tan or gray color. Clean a fouled plug with a wire brush, or replace it if cleaning doesn’t restore functionality.
Replace the spark plug annually or as needed, following the guidance in the document published on April 27, 2017. Ensure the gap is correctly set before installation. A faulty spark plug can cause hard starting, misfiring, and reduced engine power, impacting edging performance.

Advanced Troubleshooting
This section details solutions for complex issues, like engine failure, excessive vibration, or fuel line clogs, referencing the manual (8eeda72c-e862-46fc-9616-cc0619ea1918.pdf).
Engine Won’t Start – Common Causes
Diagnosing a non-starting engine requires a systematic approach. First, verify the fuel tank contains a fresh fuel mix, as outdated fuel can cause starting problems. Check the spark plug; a fouled or damaged plug won’t ignite the fuel-air mixture. Ensure the spark plug wire is securely connected.
Next, inspect the air filter. A clogged air filter restricts airflow, hindering combustion. Confirm the fuel line isn’t kinked or blocked, preventing fuel delivery. The carburetor might be clogged, requiring cleaning or professional servicing. Low oil levels trigger a safety shut-off; verify the oil level is adequate before attempting to restart. Refer to document 8eeda72c-e862-46fc-9616-cc0619ea1918.pdf for detailed diagrams and troubleshooting steps.
Edger Vibrates Excessively – Diagnosis
Excessive vibration indicates a mechanical issue requiring immediate attention. Begin by inspecting the blade; a bent or damaged blade is a primary cause of imbalance. Ensure the blade is securely fastened to the shaft with the correct hardware, tightened to the manufacturer’s specifications.
Check for loose components, including the engine mounting bolts and the edger housing. A worn or damaged bearing within the engine or blade assembly can also induce vibration. Inspect the blade guard for any obstructions or damage. Refer to the manual (8eeda72c-e862-46fc-9616-cc0619ea1918.pdf) for detailed diagrams and torque specifications. Ignoring excessive vibration can lead to further damage and potential safety hazards.
Dealing with Clogged Fuel Lines
A clogged fuel line restricts fuel flow, causing starting difficulties or engine stalling. First, disconnect the fuel line from the carburetor and fuel tank, inspecting for visible debris or blockage. Use carburetor cleaner or fresh fuel to gently blow through the lines, dislodging any obstructions.
Check the fuel filter, replacing it if it appears dirty or clogged – a common issue. Ensure the fuel tank vent is clear, allowing proper air intake for fuel flow. Consult the Yard Machine manual (8eeda72c-e862-46fc-9616-cc0619ea1918.pdf) for specific fuel line diagrams. Always work in a well-ventilated area and avoid open flames when handling fuel. Persistent clogging may indicate a deteriorated fuel line requiring replacement.

Storage and Winterization
Proper storage prepares your Yard Machine edger for long periods of inactivity, preventing damage and ensuring easy restarts next season. Refer to the manual for detailed winterization steps.
Preparing the Edger for Long-Term Storage

Before storing your Yard Machine 3.5 HP edger for an extended period, thorough preparation is crucial for maintaining its functionality and preventing potential issues. Begin by cleaning the edger completely, removing any accumulated grass clippings, dirt, and debris from the blade, housing, and engine.
Inspect the blade for wear and tear; sharpen or replace it as needed. Disconnect the spark plug wire to prevent accidental starting during storage. Drain the fuel tank completely to avoid fuel degradation and carburetor problems. Run the engine until it stalls to ensure all fuel is consumed. Change the engine oil, using the recommended type specified in the owner’s manual.
Lubricate all moving parts with a light oil. Store the edger in a clean, dry, and covered location, protected from the elements. Covering it will prevent dust and moisture accumulation. Consult the full manual (8eeda72c-e862-46fc-9616-cc0619ea1918.pdf) for detailed guidance.
Fuel System Stabilization for Winter

Protecting your Yard Machine 3.5 HP edger’s fuel system during winter storage is vital to prevent corrosion and ensure easy starting next season. Gasoline degrades over time, forming gum and varnish deposits that can clog the carburetor. To combat this, utilize a fuel stabilizer specifically designed for small engines.
Add the recommended amount of fuel stabilizer to a nearly full fuel tank, following the stabilizer’s instructions carefully. Run the engine for several minutes to circulate the stabilized fuel throughout the entire fuel system – carburetor, fuel lines, and fuel pump.
Alternatively, completely drain the fuel tank and carburetor, which is the most effective method, though more involved. Refer to the official manual (8eeda72c-e862-46fc-9616-cc0619ea1918.pdf) for specific recommendations and safety precautions regarding fuel handling. Proper stabilization safeguards against costly repairs.
Proper Storage Location and Conditions
Selecting the right storage location is crucial for preserving your Yard Machine 3.5 HP edger’s condition during the off-season. Ideally, store the edger indoors, in a dry, well-ventilated area, shielded from direct sunlight and extreme temperatures. A garage, shed, or basement are suitable options.
Avoid storing the edger outdoors, exposed to the elements, as this can lead to rust and corrosion. If outdoor storage is unavoidable, cover the edger with a waterproof tarp, ensuring adequate ventilation to prevent moisture buildup.
Before storing, clean the edger thoroughly, removing any grass clippings or debris. Consult the official manual (8eeda72c-e862-46fc-9616-cc0619ea1918.pdf) for detailed storage guidelines. Proper storage extends the edger’s lifespan and ensures reliable performance when you need it.