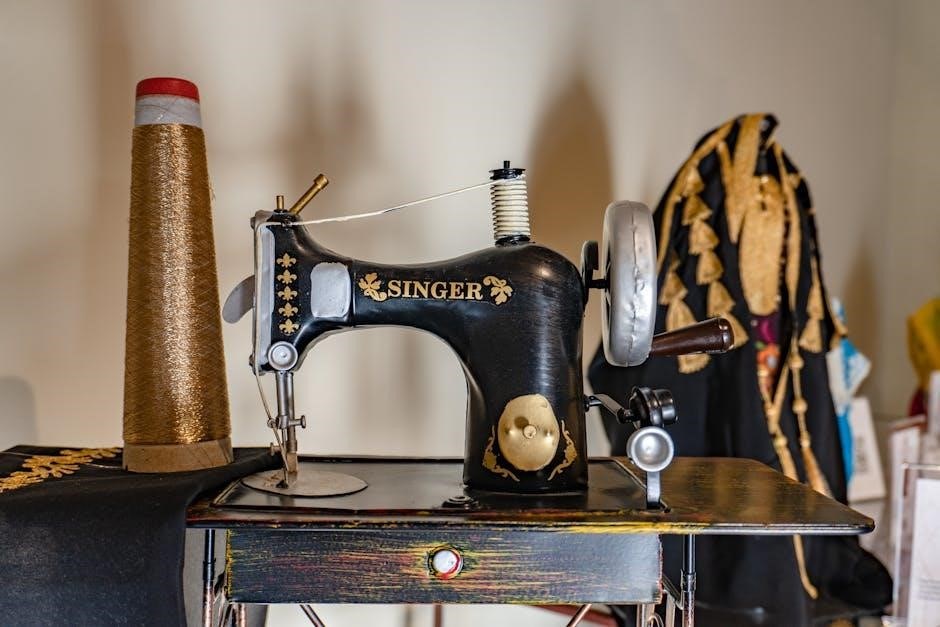
Welcome to our comprehensive guide on Singer sewing machine troubleshooting! This guide helps diagnose and fix common issues like thread bunching‚ skipped stitches‚ and machine noise. Regular maintenance‚ proper threading‚ and tension adjustments are key to resolving most problems. Learn how to identify and address these issues effectively to keep your Singer sewing machine running smoothly for years.
1.1 Importance of Regular Maintenance
Regular maintenance is crucial for ensuring the optimal performance and longevity of your Singer sewing machine. By cleaning‚ oiling‚ and inspecting the machine regularly‚ you can prevent mechanical issues before they arise. Proper upkeep helps maintain stitch quality‚ reduces the risk of breakdowns‚ and extends the machine’s lifespan. Neglecting maintenance can lead to costly repairs and downtime. Consistent care ensures smooth operation‚ allowing you to focus on your sewing projects without interruptions. Regular maintenance also helps identify potential problems early‚ saving time and money in the long run. It’s a simple yet effective way to keep your Singer sewing machine running like new.
1.2 Overview of Common Issues
Singer sewing machines‚ like any mechanical device‚ can encounter issues that disrupt sewing projects. Common problems include thread bunching‚ skipped stitches‚ needle breakage‚ and bobbin thread issues. Machine noise‚ vibration‚ and thread tension imbalances are also frequent concerns. These issues often arise from improper maintenance‚ incorrect thread usage‚ or misaligned parts. Understanding these common problems is key to addressing them effectively. This guide will explore each issue in detail‚ providing practical solutions to help you troubleshoot and restore your Singer sewing machine to optimal performance. Identifying these issues early ensures smoother sewing experiences and extends the machine’s lifespan.
1.3 Purpose of the Guide
This guide is designed to empower Singer sewing machine users with the knowledge to identify and resolve common issues effectively. Whether you’re a beginner or an experienced sewer‚ this guide provides clear‚ step-by-step solutions to keep your machine running smoothly. By addressing maintenance‚ troubleshooting‚ and advanced techniques‚ it aims to save you time and money while ensuring optimal performance. The goal is to help you diagnose problems confidently‚ perform repairs‚ and maintain your Singer sewing machine for years of reliable service. This comprehensive resource is your go-to for overcoming challenges and getting the most out of your machine.
Common Singer Sewing Machine Problems
This section outlines common issues Singer sewing machine users encounter‚ such as thread bunching‚ skipped stitches‚ needle breakage‚ and bobbin problems‚ to help diagnose and resolve them effectively.
2.1 Thread Bunching or Looping Under Fabric
Thread bunching or looping under fabric is a common issue where the thread forms loose loops or knots on the underside of the fabric. This problem often results in uneven stitching‚ making the sewn fabric appear puckered or distorted. It can occur due to incorrect thread tension‚ using the wrong needle size‚ or improper threading of the machine. Identifying this issue early is crucial‚ as it can lead to more significant problems like fabric damage or machine jamming if left unresolved. Addressing thread bunching promptly ensures smoother sewing and professional-looking results.
2.2 Causes of Thread Bunching
Thread bunching under fabric is often caused by improper thread tension‚ either too loose or too tight. Incorrect needle size or type for the fabric being sewn can also contribute. Additionally‚ improper threading‚ such as not pulling the thread tail long enough or missing the take-up lever‚ disrupts stitch formation. Using low-quality thread or fabric that is too thin or stretchy can exacerbate the issue. Finally‚ bobbin problems‚ like incorrect insertion or uneven winding‚ may lead to thread bunching. Addressing these factors is key to resolving the problem effectively.
2.3 Solutions for Thread Bunching
To resolve thread bunching‚ start by checking and adjusting the thread tension on both the top and bobbin. Ensure the needle size and type are suitable for the fabric. Rethread the machine‚ making sure to pass the thread through the take-up lever. Insert the bobbin correctly and adjust its tension if necessary. Using high-quality thread and fabric can also prevent bunching. Test the machine on a scrap piece of fabric to confirm the issue is resolved. If problems persist‚ consult the user manual or seek professional assistance for further guidance.
2.4 Skipped Stitches
Skipped stitches occur when the sewing machine needle fails to penetrate the fabric‚ leaving gaps in the stitching. This issue is often due to a dull or bent needle‚ incorrect needle size‚ or improper thread tension. To address this‚ replace the needle with a sharp‚ suitable one for the fabric type. Check the thread for tangles and ensure it’s properly seated. Adjusting the stitch length or width may also resolve the issue. Using the correct presser foot and ensuring the fabric is evenly fed can prevent skipped stitches. Consult the manual for specific settings and maintenance tips to maintain optimal performance.
2.5 Reasons Behind Skipped Stitches

Skipped stitches are commonly caused by a dull or bent needle‚ which fails to penetrate the fabric properly. Using the wrong needle size or type for the fabric can also lead to this issue. Incorrect thread tension‚ either too tight or too loose‚ may prevent the needle from forming a proper stitch. Additionally‚ using the wrong presser foot or sewing too quickly can cause the fabric to move unevenly‚ resulting in skipped stitches. The fabric type and thickness can also contribute‚ as heavier materials may require a heavier-duty needle. Regular maintenance‚ like cleaning and oiling‚ can help reduce such issues.
2.6 Fixing Skipped Stitches
To fix skipped stitches‚ start by replacing the needle with a sharp‚ appropriate one for your fabric type. Check and adjust the thread tension‚ ensuring it’s balanced for both the upper and bobbin threads. Verify that the correct presser foot is in use‚ as the wrong one can cause fabric misalignment. Slow down your sewing speed to maintain steady fabric movement. Clean the machine to remove lint or debris that might interfere with stitch formation. If issues persist‚ consult the Singer manual or adjust the machine’s timing professionally. Proper maintenance and adjustments can restore smooth stitching.
2.7 Needle Breakage or Bending
Needle breakage or bending often occurs due to improper threading‚ using the wrong needle type‚ or hitting pins. Always use a needle suitable for your fabric and ensure it’s inserted correctly. If the needle is bent‚ replace it immediately to avoid further damage. Regularly clean the machine to remove debris that could cause misalignment. Using high-quality Singer needles and maintaining proper tension can prevent such issues. If breakage persists‚ check the machine’s timing or consult a professional. Proper maintenance and the right tools will extend your machine’s lifespan and performance.
2.8 Why Needles Break or Bend
Needles break or bend due to several factors‚ including improper threading‚ using the wrong needle type for the fabric‚ or hitting pins. Incorrect needle insertion‚ such as not aligning the flat side correctly‚ can also cause bending. Using a dull or damaged needle increases the risk of breakage. Additionally‚ sewing over heavy fabrics or thick layers without the right needle can lead to damage. Regular cleaning and proper machine maintenance can reduce these issues. Always use Singer-compatible needles and adjust your technique to prevent unnecessary wear and tear.
2.9 Preventing Needle Damage
To prevent needle damage‚ start by selecting the right needle type for your fabric. Use sharp needles for woven fabrics and blunt ones for knits. Ensure proper threading and needle insertion‚ with the flat side facing the correct direction. Avoid sewing over pins to prevent bending or breaking. Use appropriate needle sizes and maintain your machine regularly to prevent added strain. Sew at a steady pace without forcing fabric through‚ and keep your machine clean from lint. Opt for high-quality‚ Singer-compatible needles and replace them periodically to avoid dullness. Proper care and attention can significantly reduce needle damage.
2.10 Bobbin Thread Issues
Bobbin thread issues are common problems that can disrupt your sewing experience. These issues often manifest as uneven stitching‚ thread bunching‚ or the bobbin thread failing to move smoothly. Incorrect bobbin installation is a frequent cause‚ as the thread may not be properly seated or aligned. Using the wrong type of thread can also lead to difficulties‚ as some threads may be too thick or thin for your machine. Additionally‚ improper bobbin tension can cause the thread to feed unevenly‚ leading to stitching problems. To address these issues‚ ensure the bobbin is installed correctly‚ use high-quality thread suitable for your fabric‚ and adjust the bobbin tension as needed. Regularly cleaning the bobbin area from lint and debris can also prevent thread issues; Always refer to your Singer sewing machine manual for specific guidance on bobbin installation and tension adjustment.

2.11 Bobbin Tension Problems
Bobbin tension problems can lead to uneven stitching‚ loose fabric‚ or even machine jamming. If the bobbin tension is too tight‚ it may cause the thread to break frequently. Conversely‚ if it’s too loose‚ the stitches may appear uneven or pucker the fabric. Improper adjustment of the bobbin case or incorrect threading can contribute to these issues. To resolve this‚ check the bobbin tension by gently tugging on the thread. Adjust the small screw on the bobbin case if necessary‚ ensuring it’s not too tight or too loose. Always refer to your Singer sewing machine manual for specific tension adjustment guidelines to maintain optimal stitching performance.
2.12 Solving Bobbin Thread Breakage
Bobbin thread breakage can disrupt sewing and cause frustration. To solve this‚ first‚ check if the bobbin is correctly threaded and seated properly in the bobbin case. Ensure the thread is not tangled or knotted before inserting it. Adjust the bobbin tension if it’s too tight‚ as this can cause frequent breakage. Also‚ verify that the needle size and type are appropriate for the fabric. Regularly cleaning the machine and using high-quality thread can prevent breakage. If issues persist‚ consult the Singer sewing machine manual or consider professional assistance to ensure proper bobbin function and smooth stitching.
2.13 Machine Noise or Vibration
Excessive noise or vibration in your Singer sewing machine can be unsettling and may indicate underlying issues. Common causes include loose parts‚ improper machine leveling‚ or buildup of lint and debris. Misaligned or worn-out components‚ such as the bobbin case or feed dogs‚ can also contribute. To address this‚ ensure the machine is placed on a stable surface and check for loose screws. Regularly clean the interior to remove lint and dust. If the noise persists‚ apply a few drops of sewing machine oil to moving parts and consult the manual for further guidance. Proper maintenance can restore smooth operation.
2.14 Causes of Excessive Noise
Excessive noise in Singer sewing machines often stems from improper maintenance or mechanical issues. Lint and debris buildup in the bobbin area or tension discs can cause friction‚ leading to loud operation. Incorrect oiling‚ such as using the wrong type or applying too much‚ can attract dust and create noise. Misaligned or worn-out parts‚ like the needle bar or hook race‚ may also contribute. Additionally‚ loose screws or an unbalanced machine can amplify vibrations and noise. Identifying and addressing these specific issues can help restore quiet and efficient performance to your Singer sewing machine.
2.15 Reducing Machine Noise
To reduce excessive noise in your Singer sewing machine‚ start by cleaning the bobbin area and tension discs to remove lint and debris. Regularly oiling the machine with the correct type and amount of sewing machine oil helps lubricate moving parts and minimize friction. Ensure the needle and hook are properly aligned‚ as misalignment can cause loud operation. Check for loose screws or components and tighten them securely. Placing the machine on a stable‚ flat surface can also reduce vibrations and noise. Finally‚ avoid overloading the machine and ensure all parts are in good working condition for quieter operation.
2.16 Thread Tension Problems
Thread tension issues can cause uneven stitches or fabric bunching. Ensure the thread is properly seated in the tension discs and guides. Check for correct tension settings—too tight or too loose can disrupt stitching. Use the same type and weight of thread in the bobbin and top to maintain balance. Avoid pulling the fabric while sewing‚ as this can misalign tension. Test the tension by sewing a straight line on scrap fabric and adjust the dials if necessary. Proper thread placement and balanced tension are key to smooth operation.
2.17 Identifying Tension Imbalance
To identify thread tension imbalance‚ inspect the stitching on both sides of the fabric. If the top thread appears loose or the bobbin thread is visible on the top‚ the tension is off. Conversely‚ if the bobbin thread is loose or the top thread is pulling too tightly‚ it indicates imbalance. Test by sewing a straight line on scrap fabric. Adjust the tension dials and retest until the stitches are even and consistent. Proper balance ensures smooth sewing and prevents fabric distortion or thread breakage during projects.
2.18 Adjusting Thread Tension
To adjust thread tension‚ locate the small dials on the machine that control the top and bobbin thread tightness. Turn the dials slightly clockwise to tighten or counterclockwise to loosen. Always test adjustments by sewing on scrap fabric. Check the stitches on both fabric sides to ensure balance. If the top thread is too tight‚ the bobbin thread may appear loose‚ and vice versa. Make small adjustments and retest until the stitches are even and consistent. Proper tension prevents puckering‚ thread breakage‚ and ensures a professional finish in your sewing projects.
Maintenance Tips for Singer Sewing Machines
Regular maintenance is crucial for optimal performance. Clean the machine‚ oil moving parts‚ and check thread tension. Balanced stitches ensure smooth sewing. Follow a maintenance schedule to extend longevity.
3.1 Cleaning the Machine
Cleaning your Singer sewing machine is essential to prevent dust and lint buildup‚ which can cause mechanical issues. Turn off and unplug the machine before cleaning. Use a soft brush to remove lint from the bobbin area‚ tension discs‚ and under the stitch plate. A small‚ dry paintbrush works well. For stubborn debris‚ lightly dampen a cloth with water‚ but avoid harsh chemicals. Regular cleaning ensures smooth operation and prevents damage. Clean after every large project or at least once a month.
3.2 Oiling the Machine
Regular oiling is crucial to keep your Singer sewing machine running smoothly. Use only Singer-recommended oil to lubricate moving parts‚ preventing friction and wear. Refer to your manual for specific oiling points‚ typically located near the bobbin area and sewing head. Turn off the machine‚ apply a few drops‚ and gently run it without fabric to distribute the oil. Avoid over-oiling‚ as excess can attract lint. Oil your machine every 10 hours of use or as needed. This maintenance step ensures optimal performance and extends the machine’s lifespan.
3.3 Regular Maintenance Schedule
A consistent maintenance schedule is vital for your Singer sewing machine’s longevity. Clean the machine daily after use‚ focusing on lint buildup in the bobbin area. Oil moving parts every 10 hours of use to keep them lubricated. Check the bobbin tension and thread path weekly. Every month‚ inspect the needle plate and presser foot for debris. Replace the needle every 8 hours of heavy use. Lubricate internal mechanisms quarterly. Following this routine ensures smooth operation‚ prevents breakdowns‚ and maintains stitch quality. A well-maintained machine performs reliably and reduces the need for repairs.

Advanced Troubleshooting Techniques
Address complex issues like electrical malfunctions‚ timing adjustments‚ and internal mechanism problems. Learn diagnostic tools and repair techniques for advanced sewing machine maintenance and repair challenges effectively.
4.1 Dealing with Electrical Issues
Electrical problems can often be traced to faulty wiring‚ power supply issues‚ or malfunctioning components. Start by checking the power cord for damage or fraying. Ensure the machine is properly plugged into a functioning outlet. If the issue persists‚ inspect the circuit breaker or fuse box. For internal electrical problems‚ such as a faulty motor or switch‚ consult the machine’s wiring diagram. Avoid attempting complex repairs without proper knowledge. Always unplug the machine before working on electrical components to ensure safety. If unsure‚ consider consulting a professional technician.
4.2 Fixing Timing Problems
Timing issues in Singer sewing machines often arise when the needle and hook are out of sync. This can cause uneven stitching or machine malfunction. To address this‚ start by checking the needle alignment and ensuring it is securely fastened. Refer to the machine’s manual for specific timing adjustment instructions‚ as procedures vary by model. Loosen the needle bar clamp and gently adjust the needle’s position. If the hook timing is off‚ you may need to remove the needle plate and bobbin case to access the internal mechanisms. Adjustments should be made cautiously‚ as misalignment can lead to further damage. If unsure‚ consult a professional technician.
4.3 When to Seek Professional Help
If you encounter complex issues beyond basic troubleshooting‚ such as internal mechanical damage‚ electrical system failures‚ or persistent timing problems despite adjustments‚ it’s wise to seek professional help. Certified technicians have the expertise and tools to diagnose and repair intricate problems safely. Attempting advanced repairs without proper knowledge can lead to further damage or safety hazards. Additionally‚ if your machine is under warranty or requires specialized parts‚ consulting an authorized Singer service provider is recommended. Don’t hesitate to reach out when faced with challenges that exceed your troubleshooting skills to ensure your machine is restored to optimal performance.
Additional Resources
Explore Singer’s official website and manuals for detailed guides. Join online forums and communities for troubleshooting advice‚ tips‚ and support from experienced users and experts.
5.1 Singer Official Support and Manuals
The Singer official website offers comprehensive support‚ including downloadable manuals‚ troubleshooting guides‚ and repair resources. These materials provide step-by-step solutions for common issues and maintenance tips. The Singer Sourcing App is another valuable tool‚ offering access to parts diagrams and repair guides. For specific models‚ Singer’s customer support team is available to address technical queries. Always refer to the official manual for your machine‚ as it contains model-specific instructions and safety guidelines. These resources ensure you can resolve issues efficiently and maintain your machine’s performance.
5.2 Online Communities and Forums
Online communities and forums are invaluable resources for Singer sewing machine troubleshooting. Platforms like Facebook groups‚ Reddit forums‚ and specialized sewing communities offer peer-to-peer support. Users share firsthand experiences‚ repair tips‚ and solutions for common issues. These forums often include detailed guides‚ photos‚ and videos to help diagnose and fix problems. Active members frequently discuss troubleshooting techniques and recommend tools or accessories. Engaging with these communities can provide real-time assistance and creative solutions from experienced sewists. They complement official resources by offering diverse perspectives and hands-on advice‚ fostering a collaborative environment for resolving sewing machine challenges.
This guide provides comprehensive insights into troubleshooting Singer sewing machines‚ emphasizing maintenance and common fixes. By applying these tips‚ users can enhance machine performance and extend longevity.
6.1 Summary of Key Points
This guide has covered essential troubleshooting techniques for Singer sewing machines‚ focusing on common issues like thread bunching‚ skipped stitches‚ and needle breakage. It provided practical solutions‚ such as adjusting tension‚ cleaning‚ and oiling‚ to resolve these problems effectively. Additionally‚ it emphasized the importance of regular maintenance to prevent mechanical failures and ensure optimal performance. By following these tips‚ users can extend the lifespan of their machines and enhance sewing efficiency. The guide also highlighted when professional assistance might be necessary for complex issues.
6.2 Encouragement for Further Learning
Mastering Singer sewing machine troubleshooting empowers you to tackle challenges confidently and creatively. Continuous learning enhances your sewing skills and machine maintenance abilities. Explore Singer’s official resources‚ online forums‚ and tutorials for advanced techniques. Experiment with different fabrics and projects to deepen your understanding. Practice regular maintenance to prevent issues and ensure smooth operation. Embrace the journey of improving your craft—each solved problem brings you closer to sewing mastery and the joy of creating something truly unique.