Understanding Eye Shapes and Their Impact on Eyeshadow Application
Understanding your eye shape is crucial for mastering eyeshadow application, as it determines how colors will enhance or balance your natural features․ Each eye shape—whether hooded, deep-set, or prominent—requires tailored techniques to achieve the most flattering results, ensuring your eyeshadow complements your unique beauty․
How to Determine Your Eye Shape
To determine your eye shape, start by looking at your eyes without makeup․ Check if your eyelid is visible when looking straight ahead—a visible lid indicates hooded eyes․ Measure the depth by comparing the eye’s height to its width․ Deep-set eyes have a pronounced socket, while prominent eyes appear more forward․ Almond-shaped eyes are longer horizontally, and round eyes are circular․ Identifying these traits helps tailor your eyeshadow technique for a flattering finish․
Best Eyeshadow Techniques for Different Eye Shapes
For hooded eyes, focus on light shades on the lid and darker tones in the crease to create depth․ Deep-set eyes benefit from medium shades applied to the outer corner to enhance dimension․ Prominent eyes look stunning with soft, neutral tones blended across the lid and crease․ Almond-shaped eyes can handle bold looks, like a smoky eye, while round eyes should opt for lengthening techniques with light shades on the inner corner and darker shades on the outer edge․
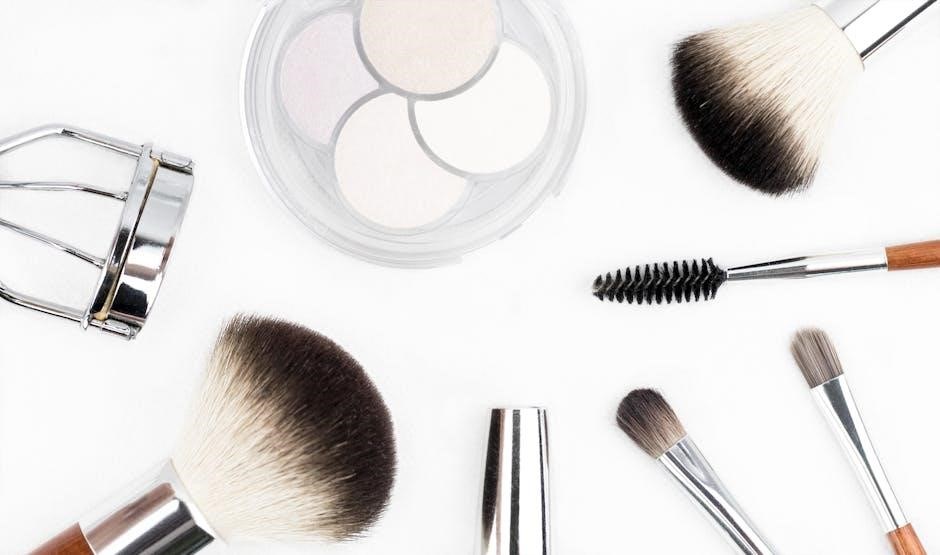
Essential Eyeshadow Tools and Products
Exploring essential eyeshadow tools and products, high-quality brushes, versatile palettes, and must-have items ensure a flawless application․ A good primer, setting spray, and makeup remover are key for long-lasting results․
Must-Have Brushes for Eyeshadow Application
The right brushes are essential for achieving professional eyeshadow results․ A base brush for all-over lid application, a crease brush for blending, and a smaller brush for the outer corner are must-haves․ Highlighter brushes add precision for under the brow bone, while blending brushes soften edges for a seamless look․ Natural bristles work best for powders, while synthetic fibers are ideal for creams․ Cleaning your brushes regularly ensures optimal performance and hygiene, enhancing your makeup experience․
Key Products Every Eyeshadow Kit Should Include
A well-rounded eyeshadow kit should include a base color for even lid coverage, transition shades for blending, and highlighters for brightening․ Neutral tones like beige and taupe are versatile, while bold shades add depth․ A primer is essential to extend wear and enhance pigmentation․ Include matte and shimmer finishes for variety, and consider a black shade for liner or depth․ Optional additions like glitter or metallics can elevate looks․ These basics ensure versatility for both subtle and dramatic styles, catering to all skill levels and preferences․
Basic Eyeshadow Techniques for Beginners
Mastering basic eyeshadow techniques involves blending colors seamlessly and starting with minimal product for buildable coverage․ This approach ensures a natural, polished look and is essential for creating a smooth base for more complex styles․
How to Prime Your Eyelids for Long-Lasting Eyeshadow
Priming your eyelids is essential for ensuring long-lasting eyeshadow․ Start by applying a small amount of primer or concealer to your lids, blending it evenly with a brush or fingertip․ This creates a smooth canvas and prevents creasing․ Allow the primer to set for a few seconds before applying eyeshadow․ For oily lids, consider using a setting powder over the primer for extra staying power․ Proper priming enhances pigment payoff and keeps your look fresh all day, making it a crucial step in any eyeshadow routine․
Applying Base Color and Transition Shades
To create a seamless eyeshadow look, start by applying a base color across your entire lid using a flat brush for even coverage․ Choose a shade close to your skin tone for a natural look․ Next, use a fluffy brush to blend a transition shade into the crease, starting light and building intensity for depth․ Ensure smooth blending by feathering the color upwards and outwards․ This technique enhances dimension without harsh lines, creating a flawless foundation for additional eyeshadow layers․
Mastering Color Selection and Coordination
Mastering color selection and coordination is fundamental for creating stunning eyeshadow looks․ Consider your eye color, skin tone, and personal style when choosing shades․ Neutral tones serve as a versatile base, while bold hues add contrast and drama․ Experiment with combinations to find what enhances your features and reflects your aesthetic, ensuring a harmonious and polished appearance every time․
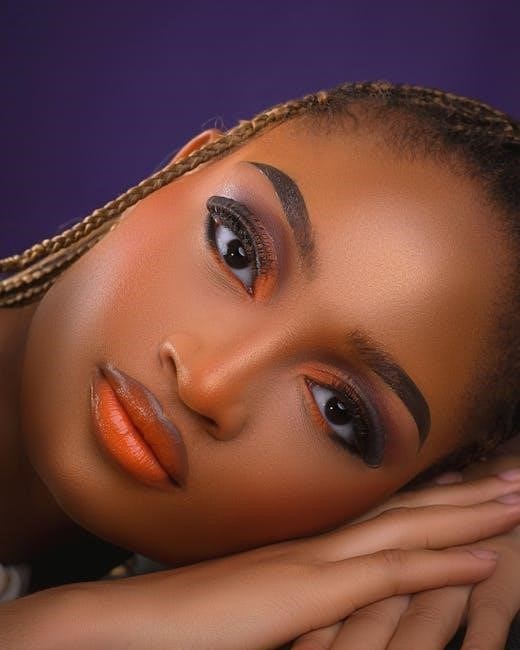
Choosing Eyeshadow Colors That Complement Your Eye Color
Your eye color plays a significant role in selecting eyeshadow shades that enhance your natural beauty․ For brown eyes, warm neutrals like caramel and bronze create depth, while cool tones such as smoky grays and deep charcoals add contrast․ Blue eyes shine with earthy shades like taupe and gold, or bold jewel tones like sapphire and emerald․ Green eyes pop with warm browns, shimmery champagnes, or rich plums․ Hazel eyes look stunning with a mix of warm and cool tones, blending seamlessly for a versatile look․ Always consider your skin tone and personal style to ensure a cohesive, polished appearance․
Creating a Cohesive Look with Neutral and Bold Shades
Neutral shades serve as the foundation for a polished eyeshadow look, while bold shades add dimension and contrast․ Start with a light neutral base, then layer medium tones in the crease for depth․ Use bold shades sparingly on the lash line or outer corner to create a striking effect․ Blend thoroughly to ensure a seamless transition from light to dark․ For a cohesive look, match bold shades to your eye color or complement them with neutral accents․ This balance creates a harmonious, professional finish that enhances your natural beauty and adds drama to your makeup․
Advanced Eyeshadow Techniques
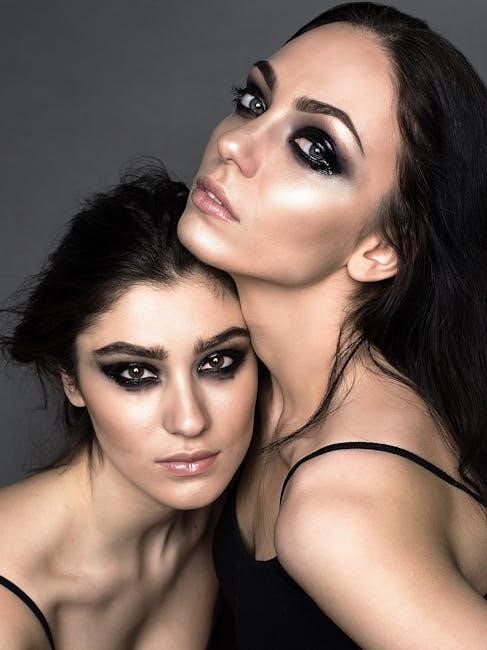
Mastering advanced eyeshadow techniques elevates your makeup game․ Explore cutting crease for sharp definition and smoky eyes for drama․ These methods enhance eye shape, add depth, and allow for endless creativity with precise application․
Highlighting and Contouring with Eyeshadow
Highlighting and contouring with eyeshadow add dimension to your eyes․ Use light shades on the brow bone and inner corner to brighten, while medium tones define the crease․ Darker shades create depth when applied to the outer corner or along the lash line․ Blend thoroughly for a seamless look․ These techniques enhance eye shape, making eyes appear larger or more almond-shaped․ Proper tool selection, like a light shader or medium brush, ensures precise application and a polished finish․
Cutting Crease and Smoky Eye Techniques
Cutting crease and smoky eye techniques create bold, dramatic looks․ For a sharp crease, apply a dark eyeshadow with a small brush, starting at the outer corner and blending inward․ Smoky eyes involve layering shades from light to dark, blending thoroughly to avoid harsh lines․ Use a light base, medium transition shade, and dark liner or shadow for depth․ Pro tip: Blend upwards and outwards to soften the look․ These techniques add intensity and sophistication, perfect for evening makeup or special occasions․
Eyeshadow Tips for Specific Eye Types
Tailor your eyeshadow application to your eye type for a customized look․ Whether you have hooded, deep-set, or prominent eyes, specific techniques enhance your natural features beautifully and easily․
Makeup Hacks for Hooded Eyes
For hooded eyes, focus on enhancing visibility by using light shades on the lid and inner corner․ Apply eyeshadow with a light hand, blending softly to avoid heaviness․ Avoid dark shades on the crease, as they can make eyes appear smaller․ Instead, use a subtle transition shade above the lash line for depth․ Highlight the brow bone to create the illusion of taller eyes․ Less product and precise blending are key for a natural, polished look tailored to hooded eye shapes․
Enhancing Deep-Set or Prominent Eyes with Eyeshadow
Deep-set or prominent eyes can be enhanced with strategic eyeshadow placement․ For deep-set eyes, use medium to dark shades on the outer corner and crease to create depth, blending softly to avoid heaviness․ Highlight the lid with light shades to make eyes appear larger․ For prominent eyes, apply darker shades above the lash line and blend upward to reduce their forward appearance․ Use subtle transitions and avoid heavy dark shades on the lid to maintain balance and create a harmonious look․
Common Mistakes and Troubleshooting
Common mistakes include over-blending, uneven application, and excessive product use․ To fix, blend gently, use light layers, and ensure proper transitions between shades for a smooth finish․
Fixing Uneven Application and Over-Blending
Uneven application and over-blending are common issues that can ruin your eyeshadow look․ To fix unevenness, start by applying a light base color across your lid, then build gradually․ For over-blending, use a fluffy brush to soften harsh lines without removing too much product․ Avoid heavy pressure, as it can cause excessive blending․ If the issue persists, clean your brushes to ensure proper pigment pickup․ Finally, blend in small, gentle strokes, focusing on transition areas for a seamless finish․
How to Remove Eyeshadow Stains and Correct Makeup Errors
To remove eyeshadow stains, gently wipe the area with a makeup remover-soaked cotton pad․ For stubborn marks, micellar water can help lift the pigment without irritation․ If you’ve over-blended or applied too much product, blend a small amount of concealer over the area to neutralize the color․ For uneven application, reapply eyeshadow starting from the center of your lid and blend outward․ To prevent future errors, use light strokes and build coverage gradually, ensuring a smooth, polished finish every time․

Finishing Touches for a Polished Look
A polished look is achieved by blending edges, setting eyeshadow with powder or spray, and adding subtle highlights․ This ensures long-lasting, professional results․
Setting Your Eyeshadow with Powder or Spray
Setting your eyeshadow with powder or spray ensures a long-lasting, smudge-proof finish․ Gently dust translucent powder over your eyeshadow using a fluffy brush to prevent creasing․ For a more intense look, use a setting spray after applying your eyeshadow․ This step helps maintain vibrancy and prevents fading throughout the day․ Choose a setting spray that complements your skin type for optimal results․ Properly setting your eyeshadow enhances its durability and keeps your makeup looking fresh and polished․
Pairing Eyeshadow with Eyeliner and Mascara
Pairing eyeshadow with eyeliner and mascara creates a cohesive, polished look․ Start by applying eyeshadow, then define your eyes with a thin or bold eyeliner stroke, depending on your desired vibe․ Finish by coating your lashes with mascara to enhance length and volume․ This trio enhances eye shape, adds depth, and ties the entire look together․ For a seamless finish, ensure your eyeliner color complements your eyeshadow palette, and use mascara to frame your eyes beautifully․